Nutrient Dense seasoning No2.

So after trying liver and kidney, I had a pack of chicken hearts in my freezer and decided to make some seasoning out of it. I also had lots of dehydrated cherry tomatoes leftover from summer and decided they will go well together. That set my next organ seasoning mix in the Mediterranean or Italian direction.

As mentioned in my previous post , the fat and sinew on the meat ads a wonderful umami flavour to the mix, so I kept it on the hearts for the dehydration process.

Nutrient Dense Italian Spice mix

Ingredients:
120g dehydrated organ meat (I used chicken hearts)
60g well dehydrated/sundried tomatoes
30g salt (Maldon or Atlantic)
20g mixed herbs such as oregano, thyme, marjoram and rosemary
10g Garlic Powder

Method:
1. Dehydrate your organ meat until it is dry enough to snap in to small pieces. I find that slicing the organ meat thinly makes everything easier.
2. Once the meat is ready, break it into small shards and place it with all the herbs and spices into a strong blender bowl that is made for grinding dry ingredients (I use a Vitamix). Add the rest of the spices and herbs.
3. Gradually and carefully blend the ingredients, while stopping every 20-30 seconds and using a thin utensil (like a chopstick) to mix the powder around and ensure an even blend. Make sure to not overheat the powder in the process.
4. Once the mix has blended into an even, cores powder, leave it to cool completely from the heat created during the grinding process and then store it in a spice shaker and the rest in an airtight container.

Uses for this spice mix:
I used it to season burgers and as a seasoning when serving food, instead of using salt and pepper.

Chocolate Cake for Chocolate Lovers

Did you know that today was chocolate cake day?

My kid is obsessed with chocolate and though it’s not a GAPS food, I started adding it in small quantities after the first year on the protocol. Before I added cocoa in, I used cocoa butter, which gives a lovely chocolaty flavour.

So, for chocolate cake day I’m sharing with you my recipe for a moist, rich and extremely chocolaty cake.

Chocolate Cake

Grain Free, Sugar Free, Starch Free and very chocolaty

Ingredients:
300g apple sauce or yogurt or a mixture of both and other leftover fruit
5 eggs
150g butter or ghee
100g coconut oil
14 Madgul dates
3 heaped tbsp cocoa powder
200g ground almonds
2tbsp coconut flour
1tsp baking soda
1/2 tsp vanilla powder
Pinch of salt

For the frosting:
1 can coconut cream (Biona)
100g almond butter
4 tbsp honey
4 tbsp best quality cocoa powder

Method:
1. Preheat the oven to 170c and prepare 2 loaf tins or 1 loaf pan and 1 cupcake tin. Make sure the baking pans are lined with parchment (or cupcake cases). Boil some water in the kettle.
2. Take the stones out of the dates and leave them to soak in the boiled water. Measure the butter and coconut oil into an= heatproof bowl and place it in the heating oven to melt.
3. Place the fruit/yogurt in your food processor bowl and add the eggs and cocoa powder and process to a smooth batter. Add the soaked dates and process them through, then add the melted fats and process.
4. Add the rest of the ingredients and process to a consistent, smooth batter.
5. Pour the batter into the prepared baking trays and place in the oven. The loaf will need 35-40min baking and the cupcakes will need 25-30min.
6. remove from the oven and cool completely before spreading the icing

Make the Frosting:
1. Open the can of coconut cream and scoop out only the set part into a mixing bowl. Keep the ‘watery’ bit for other uses. Soften the cream a little with an electronic mixer.
2. Add the almond butter and beat some more, then add the honey and cocoa powder and beat until the frosting is creamy, smooth and fluffy.
3. Spread on the cold cake and serve.

Keep refrigerated for up to 1 week.

Nutrient Dense seasoning No1.

So here is what I know:
> Organ Meat is full of readily available nutrients.
> It’s hard to get my kids to eat organ meat

One way I sneak liver into my kids meals is grinding it with beef to make burgers, meatballs and sausages. Then, I came across a company in the US called ‘Pluck‘. They make and sell dehydrated organ meat seasoning. At the same time, it seems like a new trend of spice mixes is emerging into the world of Instagram, with some new and interesting flavour combinations.
Well…
I have a food dehydrator.
I have lots of herbs and spices I want to use.
Why not have a go?!

Things I’ve learnt along the way:
1. Kidney has a very strong and prominent offal flavour and small. Use it sparingly.
2. Make sure your meat is completely dehydrated before grinding.
3. Fat left on the organs gives a fantastic umami flavour
4. The grinding process takes time. Be patient, stop, mix and start again, until you get and even grind.

I’ve made two spice mixes so far. Here is recipe No.1:

Peppery and Nutrient Dense Spice mix

Ingredients:
150g dehydrated, preferably grass fed, organ meat (I used a mix of liver and kidney)
50g Maldon salt
20g Himalayan salt
10g black pepper
7g coriander seed
10g oregano
3tsp mustard powder

Method:
1. Dehydrate your organ meat until it is dry enough to snap in to small pieces. I find that slicing the organ meat thinly makes everything easier.
2. Once the meat is ready, break it into small shards and place it with all the herbs and spices into a strong blender bowl that is made for grinding dry ingredients (I use a Vitamix). Add the rest of the herbs and spices.
3. Gradually and carefully blend the ingredients, while stopping every 20-30 seconds and using a thin utensil (like a chopstick) to mix the powder around and ensure an even blend. Make sure to not overheat the powder in the process.
4. Once the mix has blended into an even, cores powder, leave it to cool completely from the heat created during the grinding process and then store it in a spice shaker and the rest in an airtight container.

Fat Bomb Broccoli Muffins

OK, I know it’s been a while and I’m trying to bring some more forward planning and structure into my life. This includes updating this blog more often. So, here’s a great recipe that I created this week. It’s a wonderful combination of two concepts which results in a muffin that’s a bit of a meal on it’s own.

The first recipe came from Jo Witton of Quirky Cooking. She has just launched a new cookbook, but this recipe came from her first book, Life Changing Food (which I have as an app and it’s a super clever idea). Her recipe for Fat Bomb Muffins results in a very sturdy and flexible bake, but I found the flavour a bit challenging. Then, I remembered a Broccoli Cake I once made from a photocopy of a cookbook and after some online searching I found the source in the Rose Bakery ‘Breakfast Lunch Dinner‘ book. I remember loving the deep butter and fenugreek flavours and though they would work well with the fat muffins.

Well… I’m not always right… but this time I was.
These muffins are so moreish and delicious. I made them for a Baking Club meetup and they went really well with the soups the host made.

Broccoli Fat Bomb Muffins

Based on Jo Witton’s recipe: Rachels Fat Bomb Muffin

Makes 24 standard muffins

Ingredients:
200g coconut oil
225g ghee or butter (or goose fat)
280g ground almonds or a combination of ground almonds and fermented cashew butter
10 eggs
2tbsp Maldon salt
2 heaped tsp curry powder (I used Madras)
2 tsp turmeric
1-2 broccoli heads

Method:

  1. Cut all the florets off the broccoli and steam them in salted water, for a few minutes. They should still have a bit of crunch. Wash with cold water and leave to drain the a colander. Keep the broccoli stem for a different use.
  2. Preheat the oven to 170c and prepare two 12-hole muffin trays with muffin cases.
  3. measure out the coconut oil and ghee into a heatproof bowl and melt them together in the heating oven.
  4. Place the eggs, almond flour, salt and spices in a food processor bowl (or in a large mixing bowl if using a hand held blender) and process until combined. Add the melted fats and bled to a thick, creamy batter.
  5. Scoop the batter into the muffin cases, to 3/4 height and sink a broccoli floret into each muffin and use a spoon or your fingers to cover the top of the floret with some batter, then sprinkle the top with some more curry powder and salt (or any other lightweight topping you like).
  6. Bake in the hot oven for 35-40min, until the outer colour is consistent around the muffins.
  7. Cool and serve. Keep the muffins refrigerated for up to a week.

1 dough, 2 Bakes, 3 Salads | Part 2

3 Salads

Ingredients:

GREEN BEAN and SUPERCHARGED PESTO salad
2 cups frozen green beans
50g pine nut kernels
1 bunch basil
1 bunch green leaves like kale or chard
3-4 frozen broccoli florets, defrosted or steamed
1/2 cup olive oil
2 cloves garlic
1tbsp lemon juice
Optional: an extra 50g toasted pine nut kernels or walnuts
Optional: 50g grated parmesan cheese
Salt to taste

ROCKET salad
1 x 100g bag of prewashed wild rocket
2tbsp sauerkraut
2tbsp sauerkraut liquid
Olive oil

TOMATO salad
500g mixture of different tomatoes such as cherry and plum in a mixture of colours if you can get them
a few sprigs of fresh basil
1 tablespoon red wine vinegar
1/2 tsp honey
1/2 a clove of garlic

METHOD

SUPERCHARGED PESTO SAUCE

  1. Place all the pesto ingredients in a food processor and blitz to a smooth paste. If tolerated, use the optional nuts and parmesan.
  2. Taste and fix seasoning.
  3. Pour the sauce into a storage box and set aside. you will not need all the sauce you made and can keep it in the fridge or freezer for future use.

GREEN BEAN SALAD

  1. Boil or steam the frozen green beans as instructed on the packaging, then drain and wash with cold water to stop cooking and cool them down.
  2. Meanwhile, toast the pine nut kernels in a pan on a medium heat, moving them so they don’t burn.
  3. Place the cooled green beans in a bowl and add 2-3tbsp of your supercharged pesto sauce. Mix it to coat the beans, scatter the toasted pine nuts and if you like, shave some parmesan curls on top.

ROCKET SALAD

  1. Tip the rocket into a large bowl, drizzle with the olive oil and sauerkraut liquid and scatter the sauerkraut. Gently mix together and serve.

TOMATO SALAD

  1. Depending on size, halve or quarter the tomatoes into a bowl. Tear in the larger leaves from a few sprigs of basil.
  2. Add 3 tablespoons of extra virgin olive oil, mix together and add 1 or 2 tablespoons of red wine vinegar with 1tsp honey, then season to perfection. Finely grate in a peeled clove of garlic. Scatter the smaller basil leaves on top and serve.

My GAPS version of: Cauliflower Mac n’ Cheese, Chicory salad with a bright green dressing and delicious stewed fruit

Are you ready for this week’s #gapsfacelift of a Jamie Oliver meal?
Here’s comes, my GAPS version of: Cauliflower Mac n’ Cheese, Chicory salad with a bright green dressing and delicious stewed fruit (Original meal recipe by Jamie Oliver from his 30 Minutes Meals book)

CAULIFLOWER ‘MAC N’ CHEESE

Original recipe by Yael Valerie Pearl

1 large head of cauliflower
2 tbsp butter/ghee2 tbsp olive oil
1 medium onion, finely chopped
2 tbsp coconut flour
1 tsp Dijon mustard
250g GAPS 24hr fermented cream
250g Gouda cheese, grated*
1 handful raw walnuts
a few sprigs of fresh rosemary
Parmesan cheese
Salt and pepper

SALAD
2 large red chicory
2 large white chicory
1 bunch of fresh basil
1 clove of garlic
6 anchovy fillets in oil
1 teaspoon Dijon mustard
2 tablespoons GAPS 24hr yoghurt
3 tablespoons red wine vinegar
1 tbsp meat stock
a small handful of capers, drained

STEWED FRUIT
18 ripe plums or a mixture of any stone fruit you like, such as nectarines or apricots
1 teaspoon vanilla powder
2 heaped tablespoons honey
1 orange
1 cinnamon stick
Optional: 24hr cream for serving

CAULIFLOWER MAC N’ CHEESE

  1. Heat the oven to 200°c
  2. .Get rid of any outer leaves from the cauliflower, then trim off the tough base of the stalk and quarter the head. Continue to chop it into bite size pieces, including the core. Put the chopped cauliflower in a large saucepan and steam, either using a steaming basket or just in water half way up the cauliflower, until slightly tender. Drain and arrange in a glass or earthen roasting dish.
  3. Meanwhile, melt the butter together with the olive oil in a small saucepan over medium heat. Add the chopped onion and cook for about 5min, making sure it doesn’t burn. Turn down the heat to low, mix in the coconut flour and then the 24hr cream. Let it bubble for a minute or two back on medium heat then add the mustard, salt and pepper. Remove from the heat, add the grated Gouda cheese and mix it through until the sauce is smooth and thick.
  4. Pour the cheese sauce over the cauliflower and mix it gently, then scatter the crushed walnuts and grate the parmesan cheese all over. Roast in the oven for 15-20min.

STEWED FRUIT

  1. Halve and stone the plums and arrange them, cut side up, in another large roasting tray with 1 teaspoon of vanilla powder and 2 heaped tablespoons of honey. Use a peeler to peel in the zest from the orange, then squeeze in all the juice. Add the cinnamon stick, snapped in two.
  2. Place on the bottom shelf of the oven. Roast for 15 minutes.

SALAD

  1. Trim the bases of the chicory and tear the leaves over a serving platter.
  2. Quickly pick the basil leaves and scatter the small ones all over the salad.
  3. Put a small frying pan on a medium to low heat.
  4. Trim the stems off and put the basil into a blender, stems and all. You can add one or two more green leaves like kale or chard. Peel and through in the garlic clove, then add a good pinch of salt & pepper, the anchovies, 1 teaspoon of mustard, 2 tablespoons of yoghurt, 3 tablespoons of red wine vinegar and about the same amount of extra virgin olive oil. Add a small splash of meat stock and whiz until smooth.
  5. Add a splash of olive oil and the capers to the hot frying pan. Fry for a few minutes until crispy.
  6. Taste the dressing to check for acidity, then pour into a jug.
  7. Sprinkle the crispy capers all over the chicory leaves and take to the table with the jug of dressing.

TO SERVE

When the cauliflower mac n’ cheese is golden and bubbling, take it to the table.
Take the fruit out of the oven and put it to one side. When ready, serve the fruit in small glasses, layered up with 24hr cream and the fruit juices.

* A word on hard cheeses: Hard, aged cheeses are allowed on full GAPS, however, it’s recommended to introduce them after significant gut healing has occurred and to monitor the reaction. It took us a year with no hard cheeses (only gaps yogurt and cream), then another year of gradual reintroduction of hard cheeses.

#seewhatididthere to make the Jamie Oliver recipe more suitable for GAPS:

  • The Cauliflower Mac recipe, unfortunately, was a complete no-go with way too many grain based and lactose/casein ingredients. Luckily, a fellow GAPS mum warrior Yael, has a killer Mac n’ Cheese recipe in her assume new cook book, so I used that recipe and added some walnuts to replace the breadcrumbs in Jamie’s original recipe. I also ditched the pancetta since we don’t have pork products at home. I found that frying the onion for the sauce gives it a deep savory flavor, like adding onion soup powder to sauces in my pre-gaps days. Don’t skip that stage.
  • The salad was pretty straight forward and the main replacement I made was using 24hr yogurt instead of shop bought yogurt. I added some greens from the garden cause my son loves kale and it worked really well. You can also boost the dressing with more green leaves.
  • The stewed fruit recipe also required little (but vital) adjustments. I used pure vanilla powder instead of paste, which is glucose based. The sugar was replaced with honey, I didn’t use brandy and instead of the recommended vanilla ice cream, I served the fruit with 24hr fermented cream.
  • So, did it pass the Sam test?! In short, no. While he liked the idea of Mac n’ Cheese, when it was served to his plate and didn’t contain the key ingredient: macaroni, he was not impressed. He agreed to try one mouthful of square cut cauli and declared he didn’t like it. He picked the clean kale leaves out of the salad and ate them…The stewed fruit were a total NO for him, which I wasn’t surprised about at all.
    •• don’t worry, the kid didn’t go hungry. Just like any other autism mum, I was prepared with some back up food for him. GAPS food of course.••

A New Project: #GAPSingJamieOliver

After a very long time, 3 kids and a three year (ongoing) GAPS and Autism recovery journey, I’m reviving this blog with a new project. All my grain free recipes have been published on my Facebook group (@My Gutsy Kitchen), but I decided to make this blog a home for the project recipes since they are longer than the usual ones I post. So stay tuned cause this is a tasty one.

I’ve taken on a new challenge:
Jamie Oliver has always been an inspiration to me. His life story, his cooking and his style. I have some of his books and have closely followed his quest for a healthier, more sustainable existence. However, it’s safe to say that most of his recipes are not suitable for GAPS/SCD in their original form. Even those that don’t contain the obvious GAPS No No’s, still have a tablespoon of flour or sugar in them.

So what does one do with all those cook books?
Well… I challenged myself to give some chosen recipes a GAPS facelift. I will replace grain, starch and sugar based ingredients and I will incorporate core GAPS foods like sauerkraut and fermented vegetables, 24hr yogurt or cream and meat stock, to make his food even healthier and give the delicious meals gut healing properties. I’m starting with the the Save With Jamie and 30 Minutes Meals books because they full of family friendly meals which can easily be converted (I most likely will not be sticking to the 30min time frame).

Here’s to an interesting journey.

My GAPS version to Jamie Oliver’s: Mothership Sunday Roast Lamb Dinner
(From the book Save with Jamie)

Ingredients:
1 bulb of garlic
1 bunch of fresh rosemary (30g)
olive oil1x 2.5kg shoulder of lamb, bone in
3 onions
600ml home made GAPS meat stock
1 large butternut squash
1 bunch of fresh mint (30g)
1 teaspoon honey
3 tablespoons white wine vinegar > GAPSit with raw apple cider vinegar
1 tbsp sauerkraut liquid
4 Anchovy fillets (we don’t eat pork products at home)
1 bag of Brussel Sprouts, trimmed and halved
500g frozen peas
20g butter or ghee

Method:

  1. Preheat the oven to 170°C/325°C/gas 3.
  2. In a pestle and mortar, bash 4 peeled garlic cloves, half the rosemary leaves and a pinch of salt and pepper into a paste, then muddle in a good lug of olive oil. Stab the lamb all over, then stick your finger in each hole and massage the marinade in and all over.
  3. Peel and quarter the onions and place in a snug-fitting roasting tray (this is important), with the lamb on top. Add 50ml of stock, cover tightly with baking parchment and cook for 3 hours.
  4. Remove the lamb from the oven and drain the fat which you will use to coat the butternut squash. Add another 200ml of stock to the lamb, then return the lamb to the oven for another hour.
  5. Meanwhile, peel and core the butternut squash, cut it into chunks and place them in a large roasting tray. Strip in the rest of the rosemary leaves, bash and add the remaining unpeeled garlic cloves, pour the lamb fat all over and toss with salt and pepper.
  6. Pick and very finely chop the mint leaves, scrape into a small jug and mix with the honey, vinegar and 1 tablespoon of sauerkraut liquid.
  7. Chop the anchovy fillets and cook in a large frying pan on a medium heat until they start falling apart. Add the brussel sprouts with a splash of stock, cook for 5-10, then season to perfection.
  8. Remove the lamb from the oven, transfer to a platter and cover. Drain the remaining liquids from the lamb tray into a small pot and add 200ml stock, blend to a smooth consistency using a hand held blender and then simmer for 2-3min. Taste and adjust the flavors, then pour into a jug.
  9. Quickly blanch the peas in a pan of boiling water or stock for a couple of minutes, then drain (save and drink the stock, if using) and coat with butter.
  10. Serve everything in the middle of the table, with a bowl of sauerkraut and other fermented vegetables.

#see_what_I_did_there To make Jamie’s original recipe suitable for GAPS, first of all I replaced the potatoes with butternut squash and used the lamb fat instead of olive oil. You could also use other squashes and pumpkin varieties, swede or beetroot. Instead of using water, I used gut healing meat stock wherever possible. The sugar for the mint sauce was replaced with honey and I added sauerkraut liquid for it’s probiotic properties. Instead of using flour to thicken the gravy, I simply blended the onions in to thicken up the sauce. The peas were cooked in stock and then coated in butter for easier digestion and nutrient absorption.#gapslife#gaps#scd#scdlife#grainfee#glutenfree#sugarfree#starchfree#gapsstock#scdstock#gapsforautism#gapsforcrhons#scdforcrohns#gutsupport#gapsingjamieoliver#savewithjamie#familydining

SCD gone Palaeo – Recipes from my Palaeo cookery class at JW3 – Part 1

During the month of June I got a unique and exciting opportunity to share my experience and knowledge in grain-free cooking and baking. JW3 – an exciting cultural centre in London (which I mentioned in my previous post) invited me to run a two part hands-on workshop on Palaeolithic Diet (Palaeo) cooking. Those of you who know me, know we actually try and follow the Specific Carbohydrate Diet (SCD) at home, but I figured Paleo was more ‘on trend’ so I adjusted my recipes to fit the Paleo diet rules. I decided to create totally vegetarian dishes. For a diet that is considered ‘the carnivore’s diet’ and is usually heavily meat based, a range vegetarian of recipes can be a nice change. There are also meaty options for some of the recipes, but that’s your choice now. These are the recipes we cooked in the first workshop:

2014-03-08 14.57.25 2014-03-08 14.57.35

Paleo Dumplings

(Double the recipe to increase quantities)

Ingredients: Dumplings

2 large eggs
2 tablespoons Olive Oil
3/4 cup Blanched ground almonds and more as needed
2tbsp Coconut flour
1 kaffir lime leaf, finely chopped or crumbled if dry
1 teaspoon Salt
1/2 teaspoon Baking Soda
Fresh ground pepper to taste

Vegetarian Filling
¼ roasted butternut Squash (cut into small cubes, toss in oil and roast for 30-40min until soft. For extra flavour sprinkle some chinese 5 spice)
1 tsp vegetable oil
1 clove garlic
2-3 Shitake mushrooms, choped into small cubes (fresh or reconstituted dry ones)
1 tbsp Bamboo shoots, sliced into stripps
1 spring onion, finely chopped
Salt and pepper to taste

Beef filling
250g minced beef
1 medium sized onion, finely chopped
2 spring onions, finely sliced
Ginger, one thumb sized piece, finely diced
Salt to your taste
2 Kaffir lime leaves, crushed if dry, chopped if fresh

Method: Dumplings:

  1. In a medium bowl, lightly whisk eggs with oil.
  2. Add the ground almonds and coconut flour, salt, kaffir lime and baking soda and stir until smooth. If the mixture is too wet, add more ground almonds. If it’s too dry, add some water, a spoonful at a time.
  3. Let mixture stand for 20 minutes so the flours absorbs liquid.

While the dumpling mixture is resting make the filling:

Vegetarian Filling:

  1. In a frying pan heat the oil on a medium heat.
  2. fry the Shitake mushrooms (if fresh, until they soften), then add the garlic and toss for a minute. remove from the heat and mix in the bamboo shoots and spring onion, just to warm them through.
  3. Add the roasted squash to the cooled pan and mix everything into a lumpy mash. Season to taste and set aside to cool slightly.

Beef filling:

  1. In a medium sized bowl, combine all the filling ingredients and mix very well.

Assembly and steaming:

  1. Prepare a plate or tray brushed with a little oil, to place the assembled dumplings on.
  2. With wet hands, roll some dumpling mixture between your palms into a ball about the size of a cherry tomato. Now, using your thumb, press into the ball and start flattening it out into your palm.
  3. Place a teaspoon of filling (veg or meat) in the middle of the flattened ball, then start folding the sides of the dough in to cover the filling. Seal the dough back into a ball and roll it again to re-shape into a ball. Place the stuffed dumpling on the oiled plate. Repeat this stage until you run out of dumpling dough and filling.
  4. Steaming: If you don’t have bamboo steaming baskets, place a small heatproof bowl upside-down in a deep saucepan (that has a lid) and place a lightly oiled plate on top of the bowl, then pour hot water half way up the bowl and bring back to a simmer. If you have steaming baskets, bring water to a boil in a suitably sized saucepan. Prepare about 5 greaseproof paper linings for your baskets and oil them as you go.
  5. Place the dumplings in your baskets or on the plate in the saucepan and steam for 4min (vegetarian filling) or 6-10min (for the meat filling). Try one to see if it’s cooked through and the filling is piping hot.
  6. Serve immediately accompanied with the Asian Dipping Sauce (recipe below) or in and asian broth.

DSC_1656

Asian Dipping Sauce

Based on a recipe by Kendall Conrad

Makes aprox 1 cup

Ingredients:

¼ cup toasted sesame oil
¼ cup freshly squeezed lime juice (2-3 limes)
2 tbsp white wine vinegar (not strictly Paleo but adds a lot of flavour)
3 tbsp honey
1 fresh red chilli pepper, seeded and finely sliced
1 clove garlic, crushed
1 thumbnail size knob fresh ginger, crushed with the garlic
1 tsp salt

Method:

  1. Combine all the ingredients in a medium bowl and whisk well until the honey has dissolved (this can also be done in a blender or with a hand held blitzer). Hold back a few chilli slices to decorate.
  2. Transfer into a serving bowl and decorate with the reserved chilli flakes.


Fresh Spring Rolls

Based on a recipe by Kendall Conrad

Ingredients:

2 large courgettes
½ bag dried Shitake mushrooms
1 Mango, finely sliced into thin strips
1 Avocado, finely sliced and drizzled with a little lemon juice
3 small Carrots, peeled and cut into thin matchsticks
½ bunch fresh mint leaves, sliced into thin ribbons
Optional 01 – One roasted chicken breast, shredded into strippes OR one grilled salmon filet, flaked. Both seasoned as you like.
Optional 02 – ½ bunch fresh coriander, roughly chopped

Method:

  1. Place the dried shitake mushrooms in a small bowl and cover with boiling water. set aside for a few minutes.
  2. Using a peeler, peel both courgettes in long ribbons over a large bowl. Continue around the courgette until you reach the core which can be discarded.
  3. Drain the mushrooms and slice into thin slices.
  4. Prepare a chopping board on your working area and arrange the chopped fruit, vegetables and herbs (and meat or fish if using) in separate bowls, ready for assembly. It will be good to have your serving plate/tray ready as well.
  5. Take two courgette ribbons and place them one above the other with a good overlap, then in one end of the ribbons place a few carrot matchsticks, a mushroom strip, mango and avocado slices, meat or fish if using and sprinkle a pinch of herbs. Make sure the filling is placed parallel with the bottom of the ribbon. It doesn’t matter if the filling comes over the top of the ribbon.
  6. Carefully roll the courgette ribbons around the filling and stand it up on the level bottom end, and onto your serving plate.
  7. Repeat steps 5 and 6 until you have used up all the ingredients.
  8. Serve with the Asian Dipping Sauce. Can be made a few hours in advance and refrigerated.

2014-03-08 14.57.20

The last recipe in the workshop was the White Forest Muffins which I published in this blog before.


Wild Garlic Workshop at JW3

What an exciting opportunity I got – to lead some urban foraging workshop for a London-based community centre this spring. This will also result in some joint posts with my other blog where J and I post about our foraging experiences.

The first workshop is ‘Pick & Mix Will Herbs’ and focused on Wild Garlic and Stinging Nettles. For logistical reasons, and because of the warm and early spring, I only took the group to pick Wild Garlic. The Nettles will have already been too bitter at this point and most have already been through blossom and gone to seed. My solution was to pick, blanch and freeze early season nettles so they are good to go for the workshop day.

We started the workshop in Mill Hill, where the wild garlic ad already flowered and gone to seed, but the leaves were still very fragrant and good to pick.

Wild Herb workshop-Picking 01 2014-05-18 Wild Herb workshop-Picking 04 2014-05-18 Wild Herb workshop-Picking 03 2014-05-18

We then continued to JW3 which was buzzing with activity, to cook with our herbs.

Wild Herb workshop-in the kitchen 01 2014-05-18 Wild Herb workshop-in te kitchen 02 2014-05-18

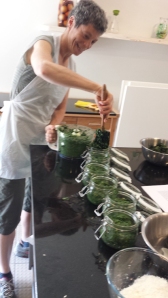
JW3 London has a beautiful, well equipped demonstration kitchen so after foraging the wild garlic we reconvened at JW3 HQ and made Wild Garlic Pesto (edited recipe below). I wanted the participants to have something to take home with them so each person got a jar of the pesto they just made but we also demonstrated how the pesto can be used to flavour a risotto dish and a simple and seemingly ambitious soufflé.

At the end of the workshop we enjoyed the fruit of our labour and a lovely lunch together.

Wild Herb workshop-lunch 2014-05-18

These are the recipes we learnt on the day:

Wild Herb Pesto:

Makes aprox 0.5 l

Ingredients:

2 large bunches Wild Garlic (Ramson)
1 bunch Stinging Nettles
100g Walnuts
50g Parmesan Cheese (optional)
2-3 Garlic cloves
150ml Olive Oil
Salt to taste

Method:

  1. Heat the oven to 150Ëšc. Place the walnuts on a baking sheet and roast in the oven until golden, shaking after five and seven minutes to make sure they brown evenly and don’t burn. You can also do that in a dry pan on a medium heat but I prefer using the oven.
  2. Once the Walnuts are browns place them, along with the rest of the ingredients in a food processor and process until smooth, then season to taste. You could also make your paste the traditional way, using a pestle and mortar.
  3. Sterilise your storage jar and pour the pesto into it. Cover with a little extra olive oil and seal. Store in the fridge for up to two weeks. Alternatively, pour the pesto into ice-cube trays and freeze, then transfer the frozen cubes to a bag and keep in the freezer to use when needed.

– The following recipes are NOT Specific Carbohydrate Diet friendly as the ingredient used are grain based –

For a SCD friendly Risotto recipe follow this link

White Risotto with Wild Herb Pesto:

Based on a recipe by Jamie Oliver

Serves 6

Ingredients:

1 liter Stock (I used vegetable, made from a stock cube as it was the most practical way at the demo)
2tbsp Olive Oil
a knob of Butter (aprox 25g)
1 large Onion
2 cloves Garlic
1/2 head of Celery
400g Risotto Rice
350ml Dry White Wine
Salt and Pepper to taste
50g Butter
50g Parmesan Cheese
a handful of toasted Pine Nuts to decorate (or use some of the toasted walnuts you used to make the pesto)

Method:

  1. Heat the stock and Finely chop the onion, celery and garlic.
  2. Heat the olive oil and butter in a saucepan. Add the chopped onion, garlic and celery and cook on a medium heat very slowly for about 15 minutes without colouring. When the vegetables have softened, add the rice and turn up the heat.
  3. The rice will start to fry so keep stirring it. After a minute it will start looking a little translucent. Add the wine and keep stirring.
  4. Once the wine has cooked into the rice add the first ladle of stock and a good pinch of salt. Turn the heat down to a simmer so the rice doesn’t cook too quickly and unevenly. As the rice cooks it will soak up the stock, so keep adding ladlefulls of stock, one at a time while stirring it in to develop the starch. Continue doing that for about 15 minutes, until the rice is soft but with a slight bite. If you run out of stock, add some boiling water.
  5. Remove from the heat and stir in the 50g butter and parmesan. Place a lid over the pan and allow to sit for 2 minutes. This will turn the risotto creamy and oozy like it should be. Check seasoning and amend if necessary.
  6. Divide the risotto between your plates and top with a generous dollop of the wild herb pesto. Decorate with some wild garlic flowers (if available) and the toasted nuts and drizzle some olive oil.

Wild Herb Soufflé:

Makes 8 individual soufflés

Ingredients:

For the Béchamel Sauce:
20g butter
1tbsp plain flour
150ml Milk
Salt to taste

For the Soufflé:
350g Nettle tops, washed and blanched. Finally chopped
100g Wild Garlic leaf, washed and finely chopped
1 heaped tbsp wild herb pesto
150ml béchamel sauce
10 sun-dried tomatoes, roughly chopped (optional)
8 mushrooms (optional, use any verity you like), shallow fried and roughly chopped
4 medium eggs (yolks and whites separated)
35g hard strong cheese (like parmesan, optional), grated, plus a little for lining the ramekins
Melted butter – enough to line the ramekins
Salt and pepper to taste

Method:

  1. Make the béchamel sauce: In a medium-sized saucepan melt the butter, then add the flour and a pinch of salt, and stir well using a wooden spoon. Let the butter and flour cook for a minute or two, stirring constantly with a wooden spoon. Start adding the milk, a bit at a time, constantly stirring to dissolve the flour mix without leaving lumps. Cook over a medium heat, constantly stirring, until the sauce thickens to the consistency of custard. Leave to cool slightly and start preparing the soufflé
  2. Roughly chop the mushrooms and fry with a little oil until cooked. Remove from the heat and set aside to cool.
  3. Heat the oven to 220°C. Brush the inside of the ramekins with melted butter and coat with a little grated cheese. Divide the sun-dried tomatoes and mushrooms equally between the ramekins, placing a little in the bottom of each.
  4. Beat the egg yolks and stir them into the béchamel sauce (make sure it’s cool enough so the yolks don’t cook and become lumpy in the sauce), then mix in the nettles, wild garlic and pesto. Adjust seasoning if necessary.
  5. Beat the egg whites until stiff, then fold the nettle mixture into the egg whites and scrape into the ramekins, filling them to the top. Level off with a knife and run your fingertip around the very edge of each ramekin to make a groove in the mix (helps it rise evenly). Sprinkle over a bit of grated cheese.
  6. Bake for 12 minutes and serve immediately.

Enjoy!

Flippin’ easy pancakes

Before coming to this country I never heard of Shrove Tuesday but like any tradition that has anything remotely to do with food, I embraced it and started flipping pancakes with a variety of toppings – as much As I tried, the sugar and lemon part of the tradition does not excite my taste buds at all.

Pancakes for me are weekend food, when you have time in the morning to indulge and surprise your other half with breakfast in bed, the kind that gives you energy for the rest of the day. When I started cooking the SCD way I naturally tried to find good replacements for my usual pancake recipe. After exploring some recipes I found online and in cookbooks, trying all sorts of ingredients such as ground almonds, coconut flower and cashew nuts, I finally landed on a recipe that really ticked all the pancake boxes: quick & easy to make, good flavour & texture and keeps you full for long.

Some notes on the recipe:

  • The recipe is child friendly. I usually use a small food processor to make the batter, but if kids are making it and they are not old enough to use sharp electrical appliances, they should use the manual option of the process.
  • The quantities make apron 10 small pancakes and 4-5 large ones.
  • I believe the first batch of pancakes is always a ‘sacrifice to the pancakes gods’ and usually rippes, scrunches or burns, so don’t panic if the first few pancake aren’t perfect, just hide them at the bottom of the pile.
  • I like using coconut oil for frying the pancakes. It burns at high temperature which makes it a bit healthier than other fats or oils, but the best bit about it that it fills the kitchen with scents that send me back to the streets of Bangkok.

Banana Pancakes

Based on this recipe, with my changes

Ingredients:

1 ripe Banana (the riper the better)
2 Eggs
1 tbsp nut butter (any nut butter you have at home, almond, cashew or peanut are all good, as long as they are pure)
1 tbsp Coconut Oil for frying (it’s good for frying as it burns at hight temperatures but you can use any other vegetable oil or butter/ghee you prefer)

2014-03-01 09.40.34

SCD Banana Pancakes batter, made in a processor and made manually in a bowl

SCD Banana Pancakes Ingredients

SCD Banana Pancakes Ingredients

Method:

  1. If you have one, chop the banana and it with the eggs and nut butter in a small food processor or blender and blitz to a smooth batter.2014-03-01 09.38.37
  2. If you are doing it manually, use a fork to mash the banana to a puree on a plate or cutting board, then place the banana in a bowl with the eggs and nut butter, whisk to a smooth batter.
    2014-03-01 09.30.44
  3. Warm the oil in a frying pan on the hob to a high heat.
  4. Lower the heat to medium and using a small measuring cup to dollop the batter into the hot pan.
  5. When small bubbles appear on the pancakes, it’s time to flip them and fry for another minute on the other side (just like with wheat based pancakes).
    2014-03-01 09.44.24 2014-03-01 09.41.46
  6. Continu making pancakes until the batter is all used up, then serve with fresh fruit and drizzle honey on top.
    2014-03-01 09.51.59

Enjoy.